Introduction
This article assists with the configuration of an Okta integration app for the purpose of single sign on with Contact Point.
Background
Users logging into Contact Point have various options, including:
- Basic authentication
- Single sign on using Office 365, Google or Okta
Configuring Okta
To configure the Okta integration app you’ll need to have administrator access to the Okta admin portal.
- In the Okta admin web portal, navigate to Applications and select Create App Integration.
- Select the following value for the Sign-in method: OIDC – OpenID Connect.
- Select the following value for the Application type: Web Application.

- Click Next.
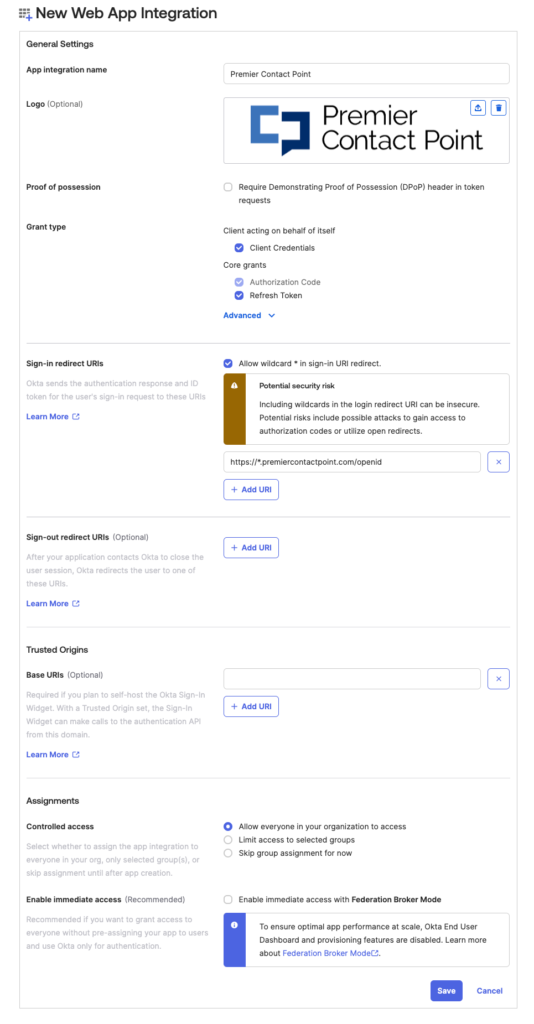
- Enter the value Premier Contact Point in the App integration name field.
- If you’d like to add the Premier Contact Point logo just ask us for the latest logo image.
- In the Grant type section, select the value Client Credentials and Refresh Token.
- In the Sign-in redirect URIs section, select Allow wildcard * in sign-in URI redirect, remove the localhost example URI by clicking the x next to the URI entry.
- Click the button + Add URI and enter this value, https://*.premiercontactpoint.com/openid
- In the Sign-out redirect URIs section, remove the localhost example URI by clicking the x next to the URI entry. No URI will be populated here.
- In the Assignments section, select the controlled access option that best suits your needs.
- Click Save.
An example of the configuration page is below:
Configuring Contact Point
Information we need from you
You’ll need to provide us with the client id and client secret for the Okta integration app you just configured.
These can be found by navigating in the Okta admin web portal to Applications and then by clicking on the Premier Contact Point application name, copy the Client ID and send it to servicedesk@premiercontactpoint.com.au, we’ll also need the Client secret but be sure to treat this like a password and send it to us via a secure/alternative method.
User configuration
To configure Contact Point you’ll need administrator access.
- Navigate to the Administration tool.
- Using the left hand menu, select Users and Teams.
- Edit the first user that will login with Okta either by double clicking their name or selecting the checkbox to the left of their name and clicking the edit button.
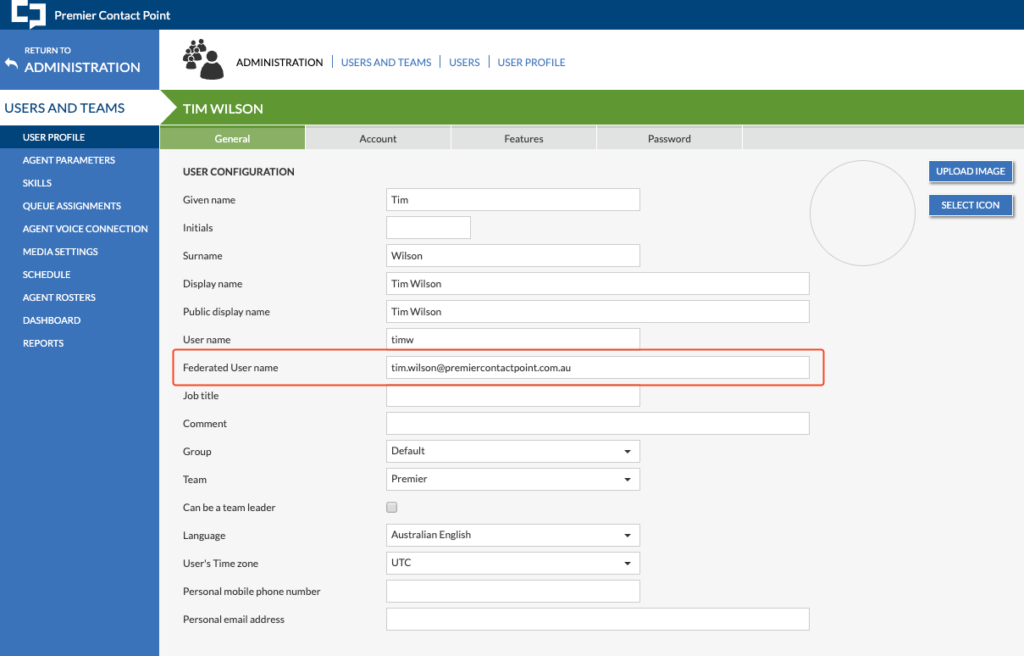
- For each user you’ll need to add their Okta email address into the Federated User name field.

- Repeat for all users.
All done! We’ll confirm back to you when your client id and secret has been allowed on our end and once done you’ll be able to sign in via Okta.
