- Support
- User & Queue Administration
- How to apply Emergency mode
Introduction
This article describes the processes for enabling emergency / disaster mode in the Contact Flows section of the Premier Contact Point administration module.
Background
If the business experiences an emergency / disaster event, they may want to notify customers trying to contact them that they are unable to handle their call.
After hearing the message about the event, the customer may be provided with options to leave a message, have their call redirected to another location, or the call can be ended.
How to enable emergency / disaster mode
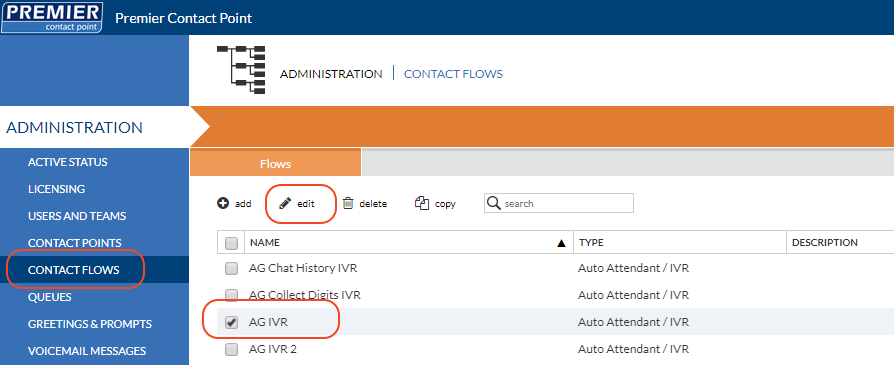
- Select Contact Flows from the Administration menu panel.
- Select the IVR to be set in emergency mode from the list of IVRs and click edit.

- Select Notifications from the Contact Flows menu panel.
- Click the Enable button to activate Emergency / Disaster mode.
- Select the appropriate message from the emergency notification message dropdown menu to play to callers while Emergency / Disaster mode is active.
- Click Save.

How to disable emergency / disaster mode
- To deactivate Emergency / Disaster mode, repeat Steps 1 to 3
- Click the Disable button to deactivate Emergency / Disaster mode.
- Click Save.

Before enabling Emergency / Disaster mode, the Administrator should be familiar with the call handling process that will be activated. To review your emergency / disaster routing, select configuration from the Contact Flows menu panel and click edit flows on the Production Copy to review the call flow.
Messages used for emergency mode must be stored in the Notification Prompts section located in the Greetings & Prompts section of the administration module.
For more information on uploading and recording prompts see the related article.
See also: