- Support
- User & Queue Administration
- How to enable Accept Requeue on a user profile
Introduction
This article describes the processes to enable Accept Requeue in conjunction with Direct Audio within the administration module of the Premier Contact Point platform.
Background
Agents connecting via Direct Audio are continuously connected to the platform meaning calls could drop in at any stage while they are available.
If agents require accept / requeue functionality for offered calls (like their phone ringing when connected via PSTN) the accept / requeue option must be configured.
With accept / requeue configured, agents are provided simulated ringtone via the computer when they are offered the call, to accept the call the agent must click accept within the configured response time.
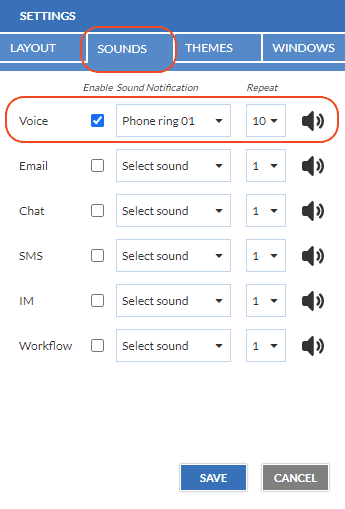
Agents can set their preferred sound notification and number of notifications via their Agent Desktop Settings menu.
How to enable Accept Requeue on a user profile
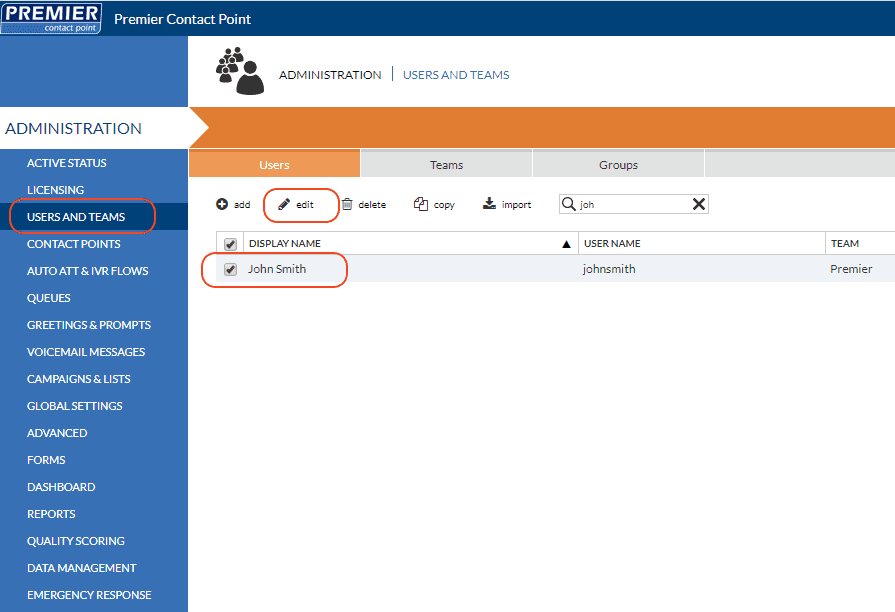
- Select Users and Teams from the Administration menu panel.
- Select the relevant user from the list and then click edit.

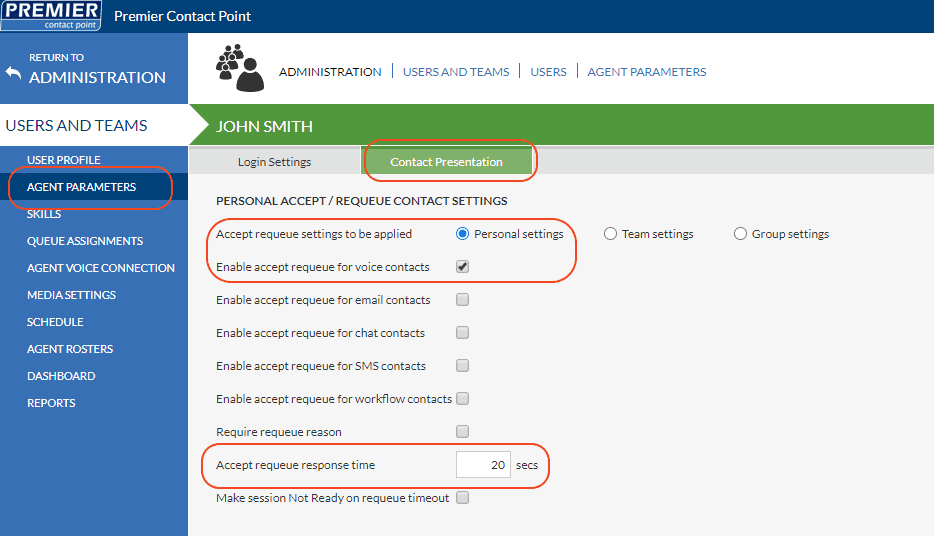
- Select Agent Parameters from the Users and Teams menu panel.
- Navigate to the Contact Presentation tab.
- Select the radio button for Personal settings and click the tick box for Enable accept requeue for voice contacts option.
- Set the preferred Accept requeue response time in seconds.

- Click Save.
Setting your preferred audio notification via the agent desktop
- Select Settings from your profile menu.

- Navigate to the Sounds tab.
- For the Voice section click to Enable, then set your preferred Sound Notification and number of Repeats.

- Click Save.